

Owner Builders
The Smarter, Faster Way to Build.
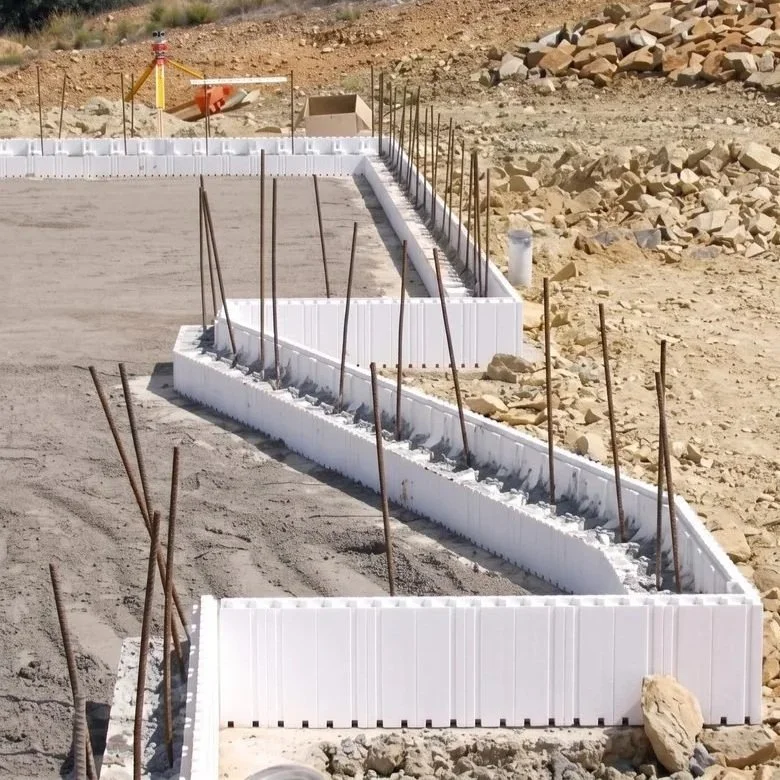
Slabs, Footings, and Sloping Sites
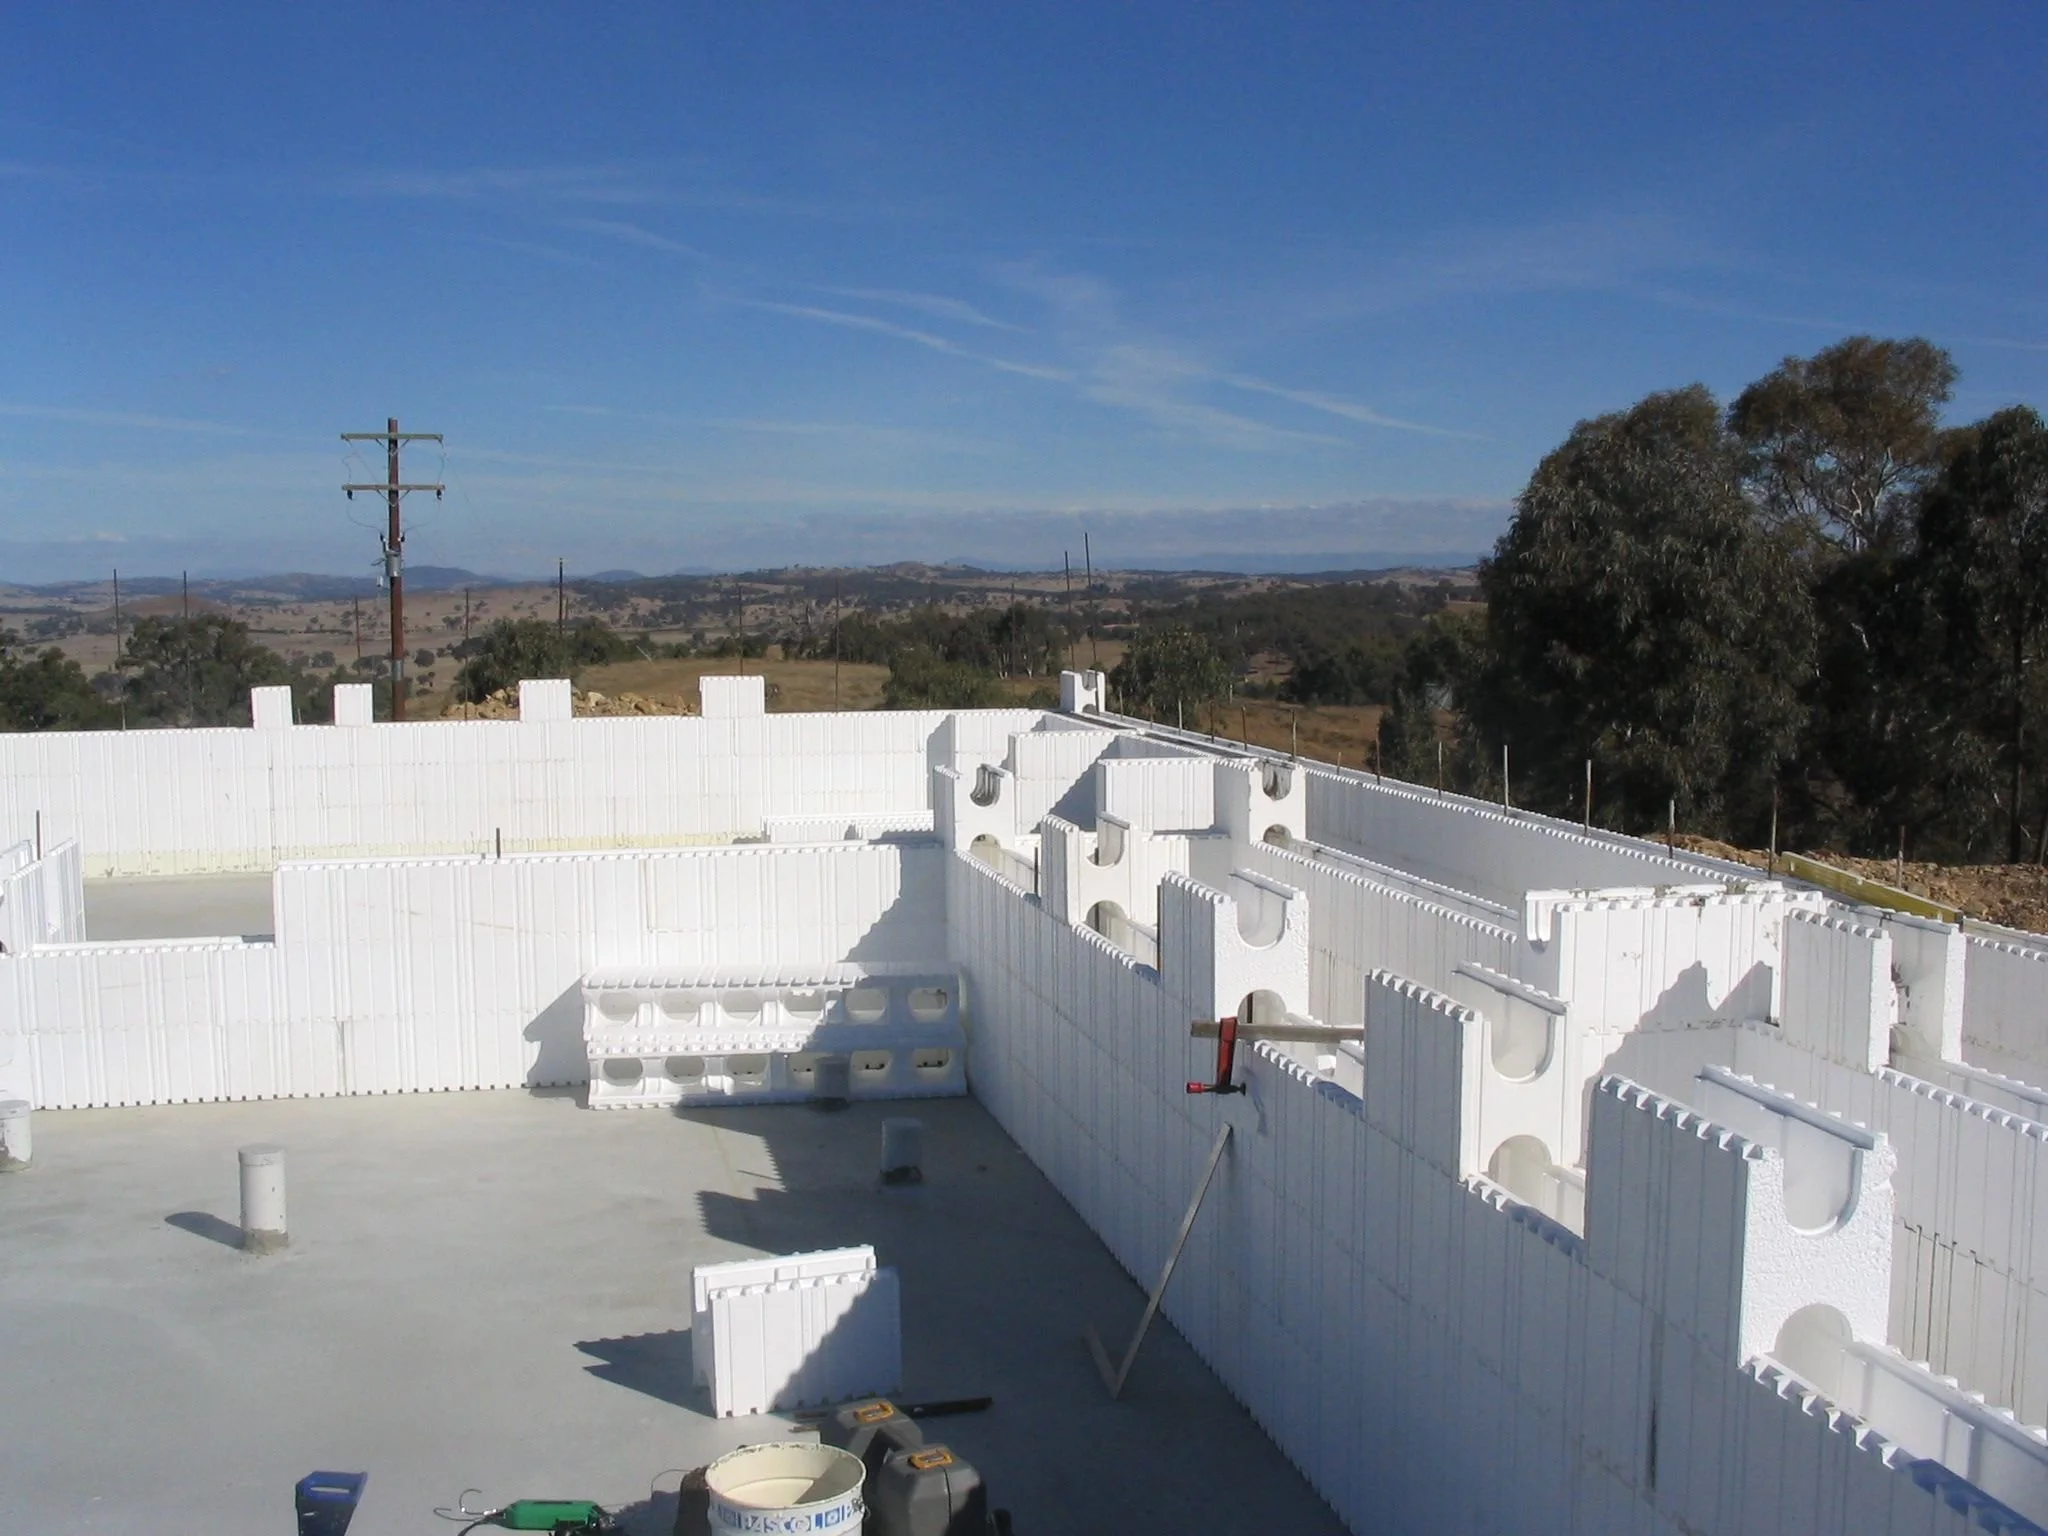
Thermacell locks straight onto any standard foundation—flat slabs, strip footings, or sloping sites. On a flat pad, you and a mate simply dry-stack the first course straight over the starter bars. If you’re building into a hill or adding a garage underneath, the 250 Series core doubles as both your engineered earth-retaining wall and structural house wall in a single pour.
Frame your internal walls with standard timber, or step down to 125 Series blocks to kill room-to-room noise and tie the whole build together. Just get a concreter to pour your slab dead level, and you’re ready to stack.
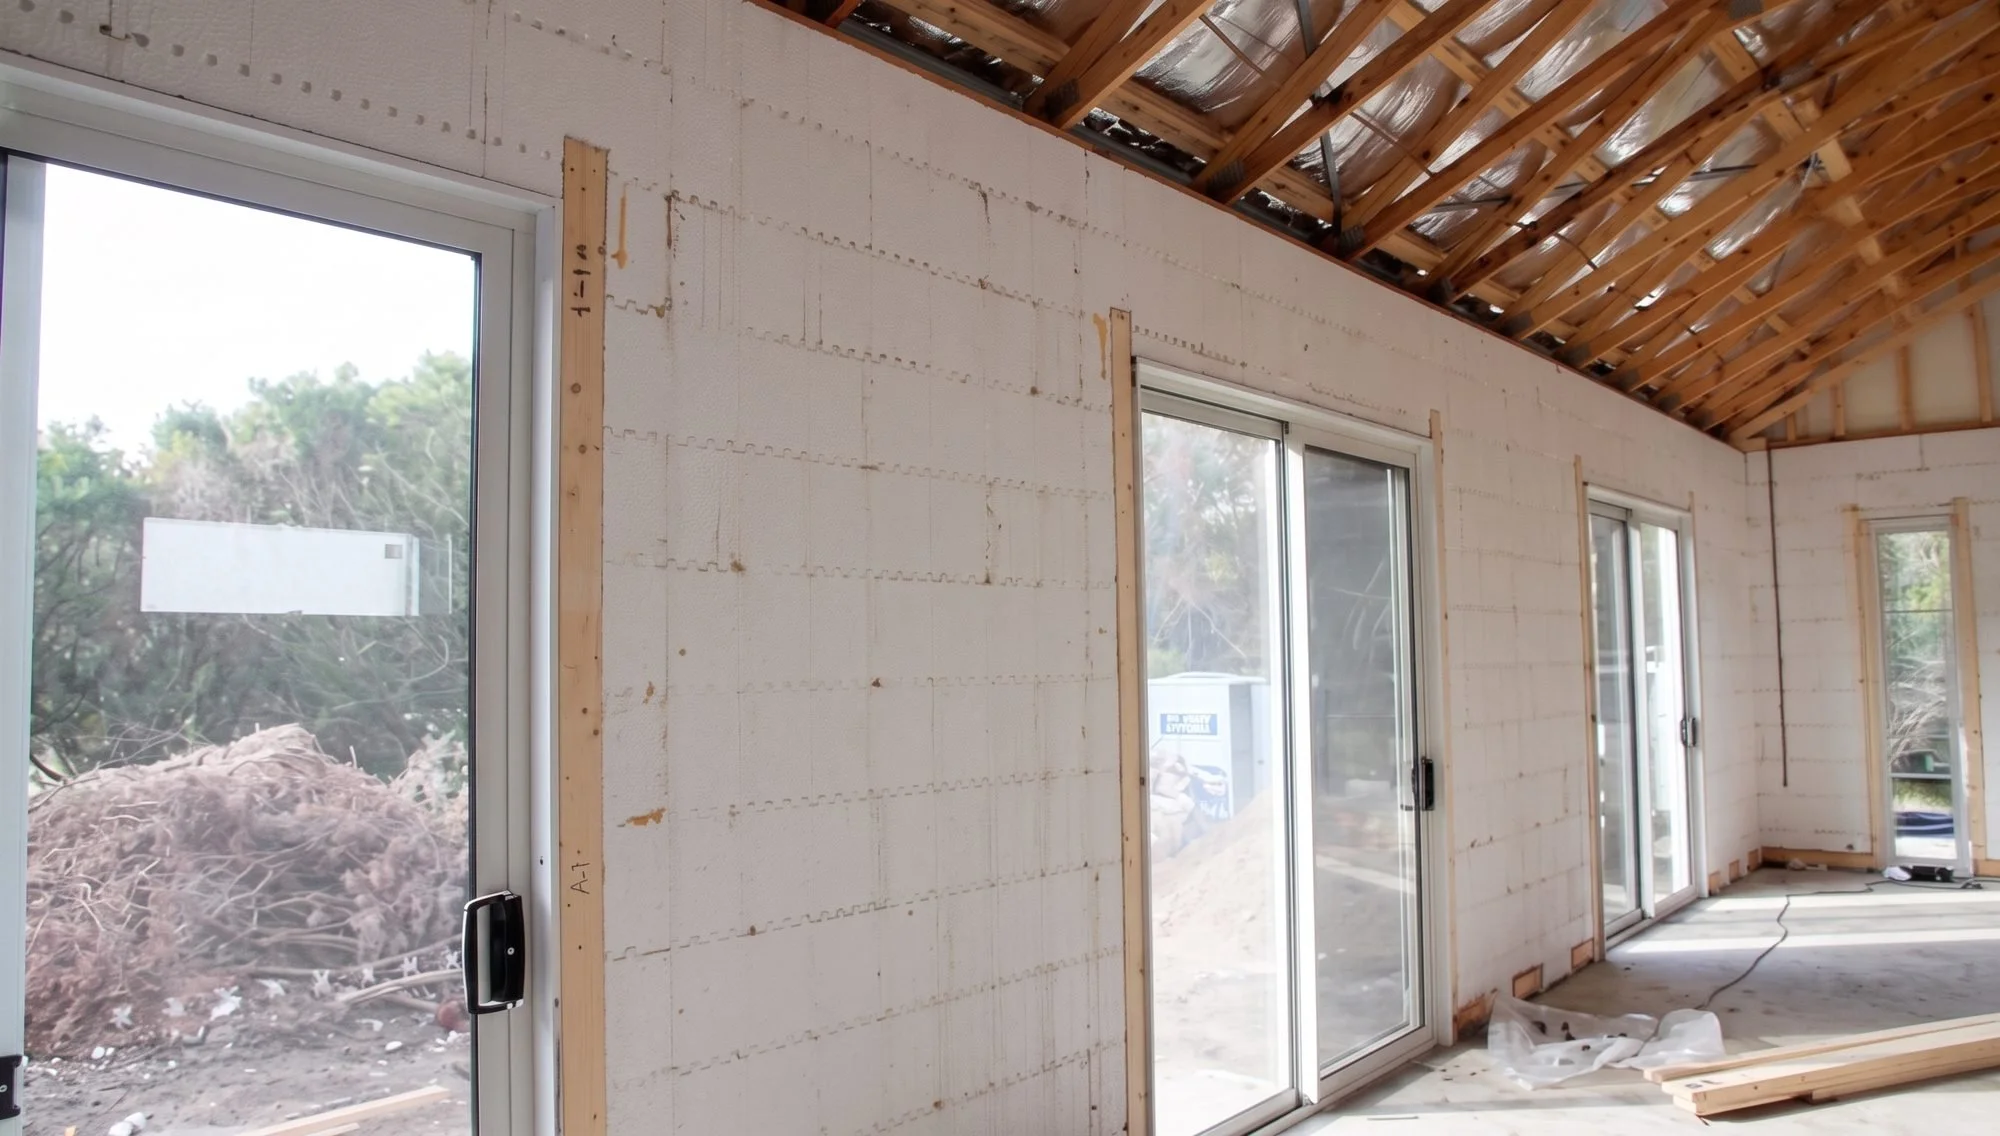
Door Frames & Window Openings
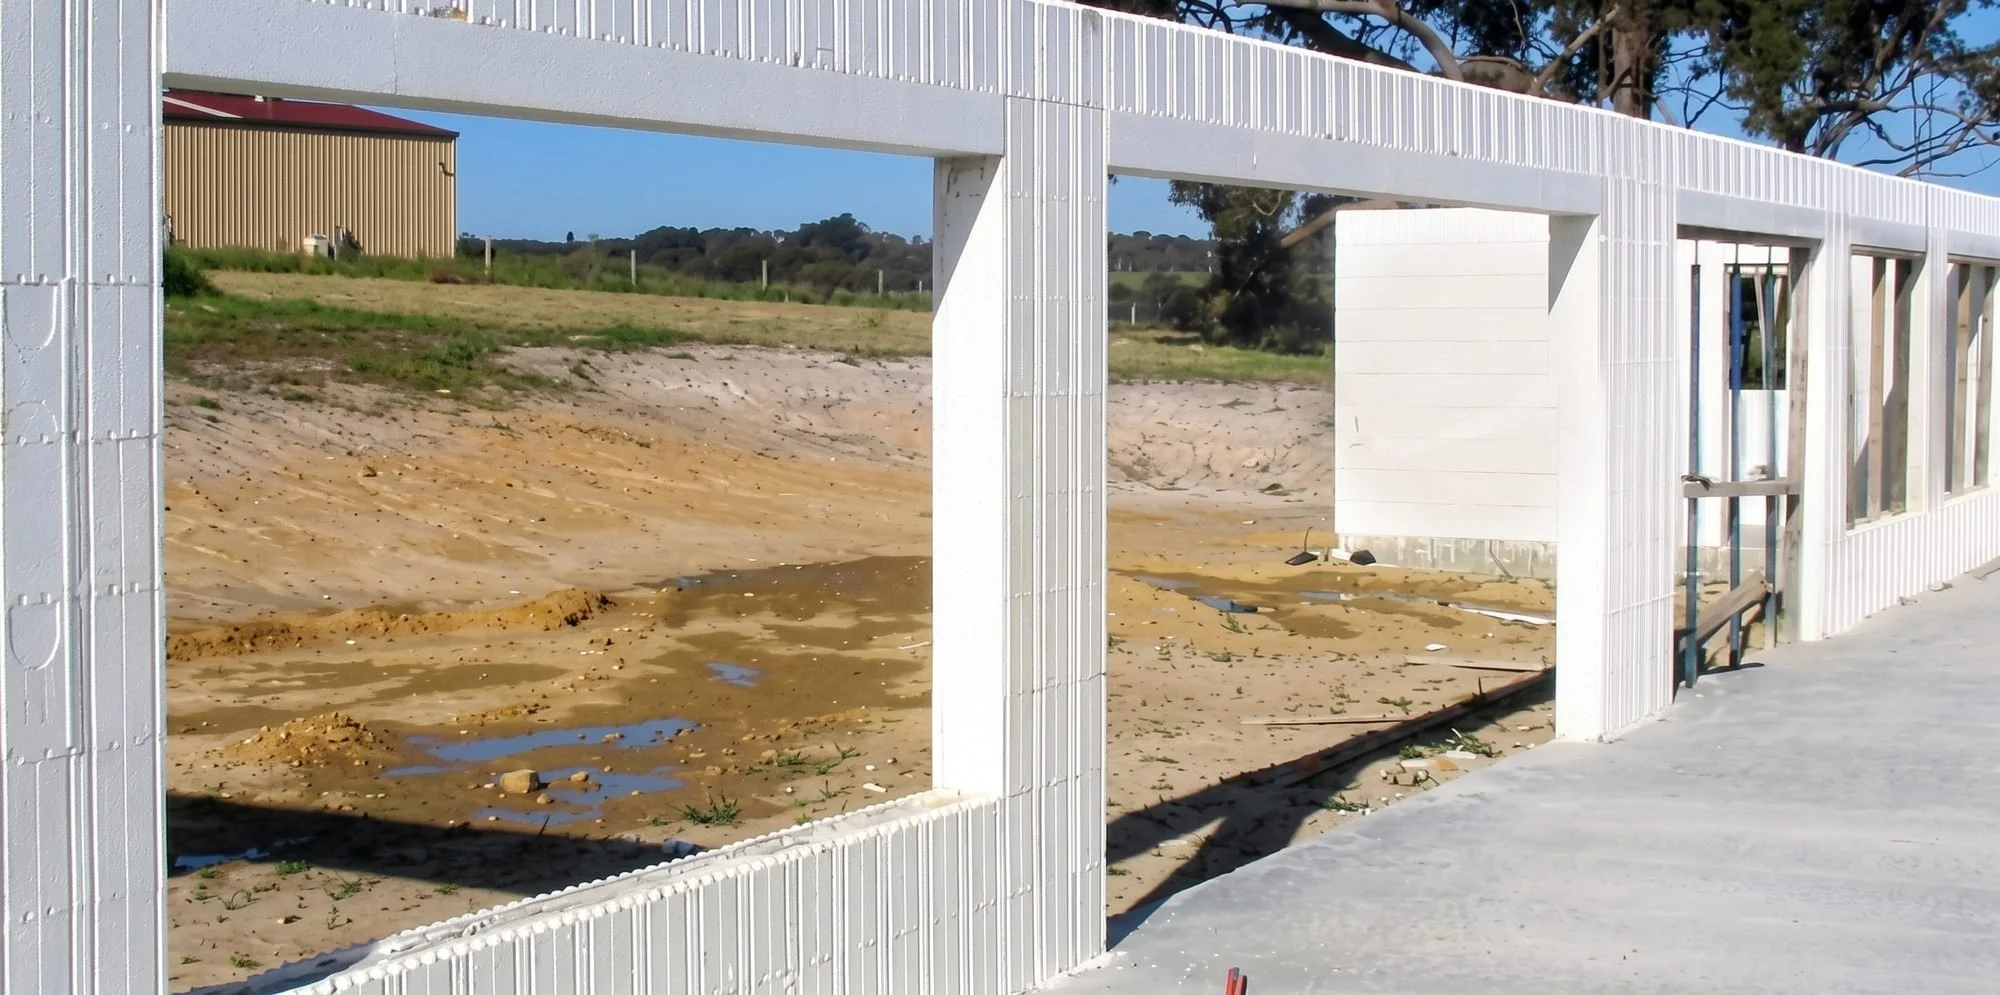
Securing door frames is straightforward and requires no special hardware. You simply cut shallow recesses into the foam on both sides of the rough opening, sit timber retaining blocks flat against the concrete core, and fix them with standard plugs and nails.
Once your timber blocks are anchored solid into the concrete, slip your door frame into position, pack it square, and nail it straight to the blocks. It gives you a rock-solid, permanent fixing that won't shift or pull away from the wall.
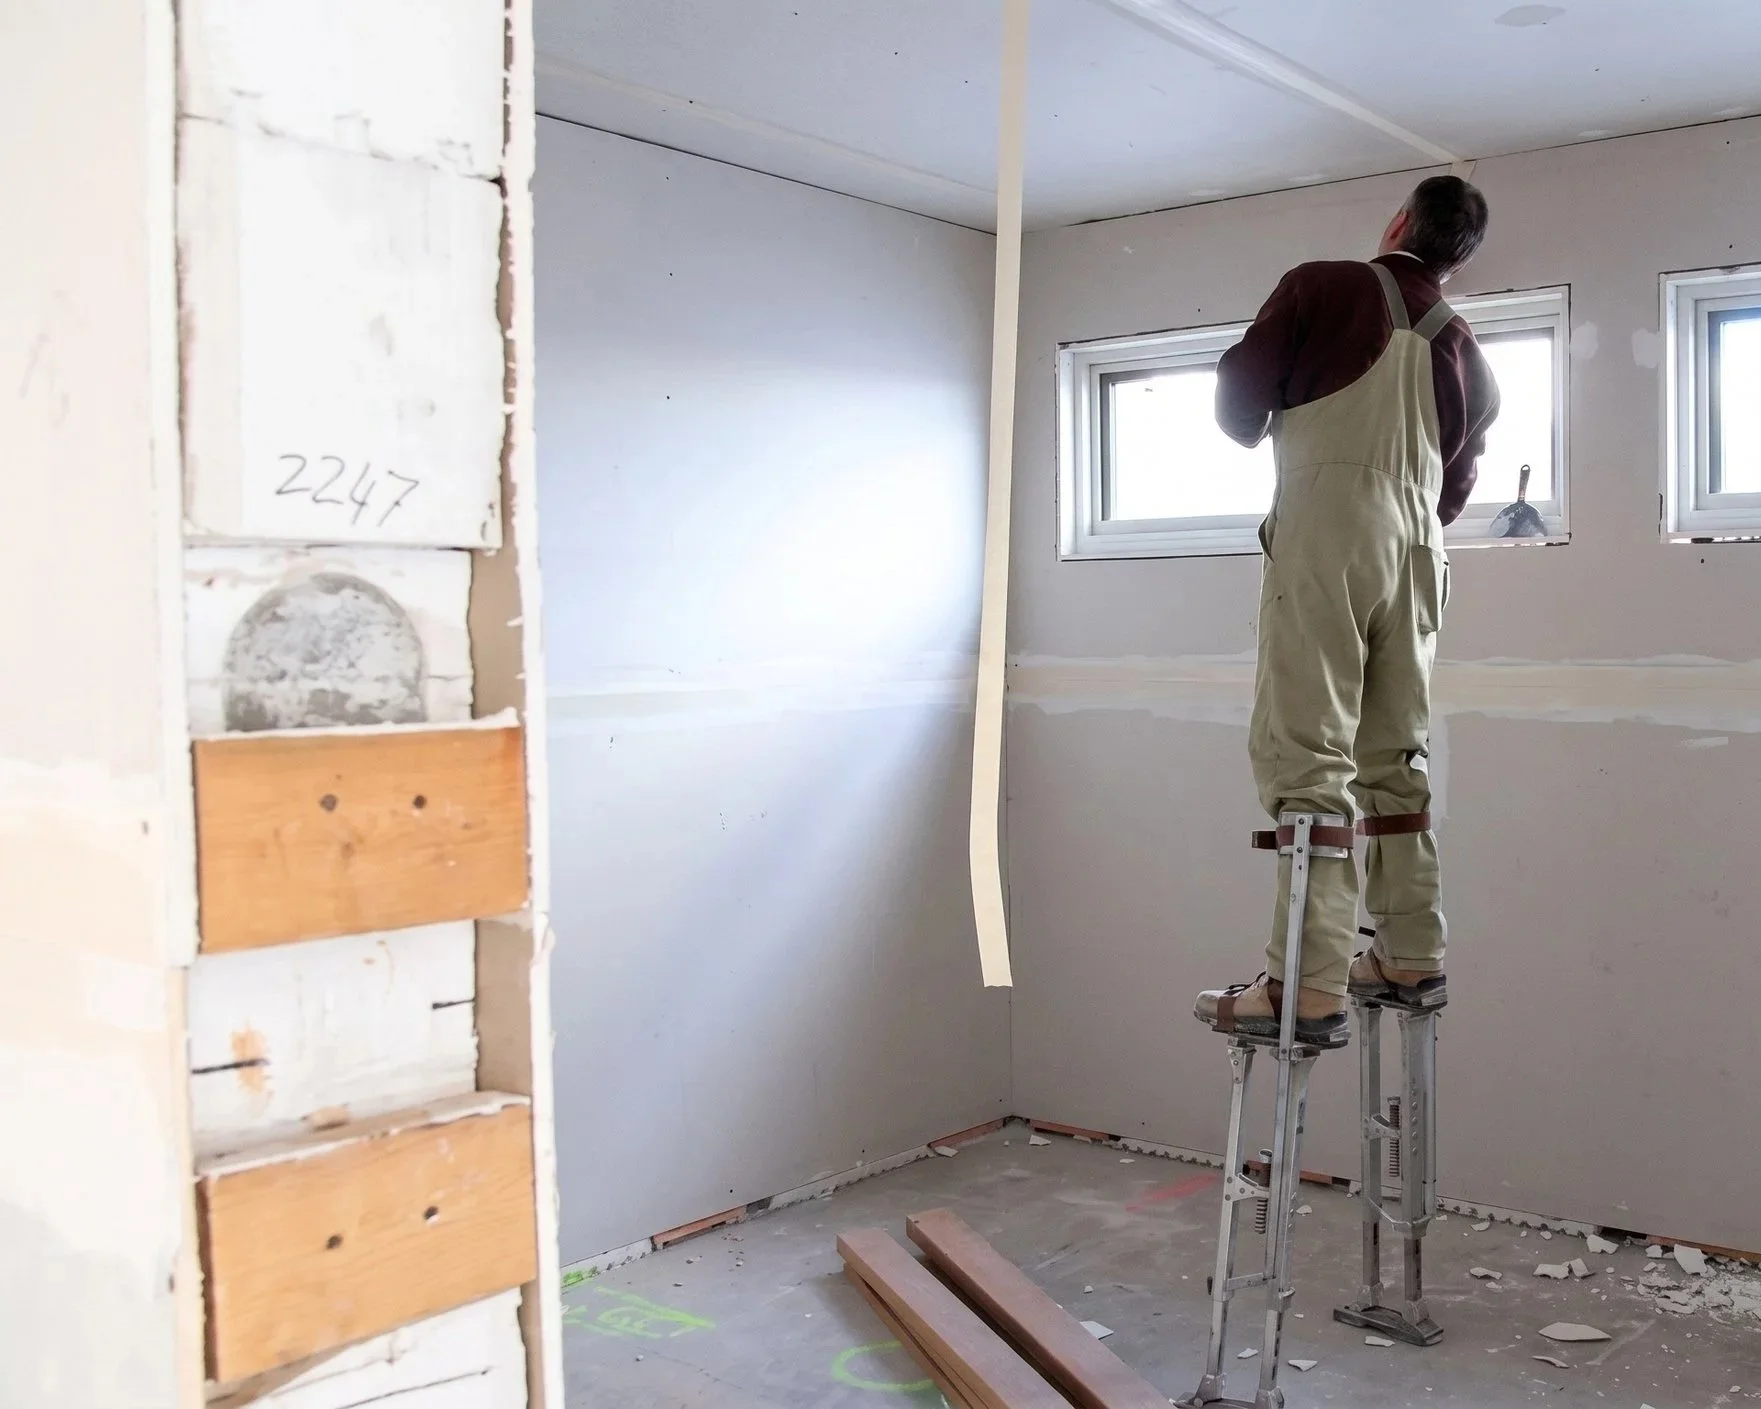
Plastering & Internal Walls
Fixing plasterboard to Thermacell is clean, fast, and needs no battening out. Give the foam a quick scrub with a stiff yard broom to remove any sun oxidation and key the surface, then apply standard stud adhesive daubs straight onto the block.
Press your plaster sheets firmly against the wall, using standard plastering nails tapped into the EPS or concrete core to hold the sheets dead flat while the glue goes off. Once cured, you have a solid, airtight internal finish with no hollow drumming sound.
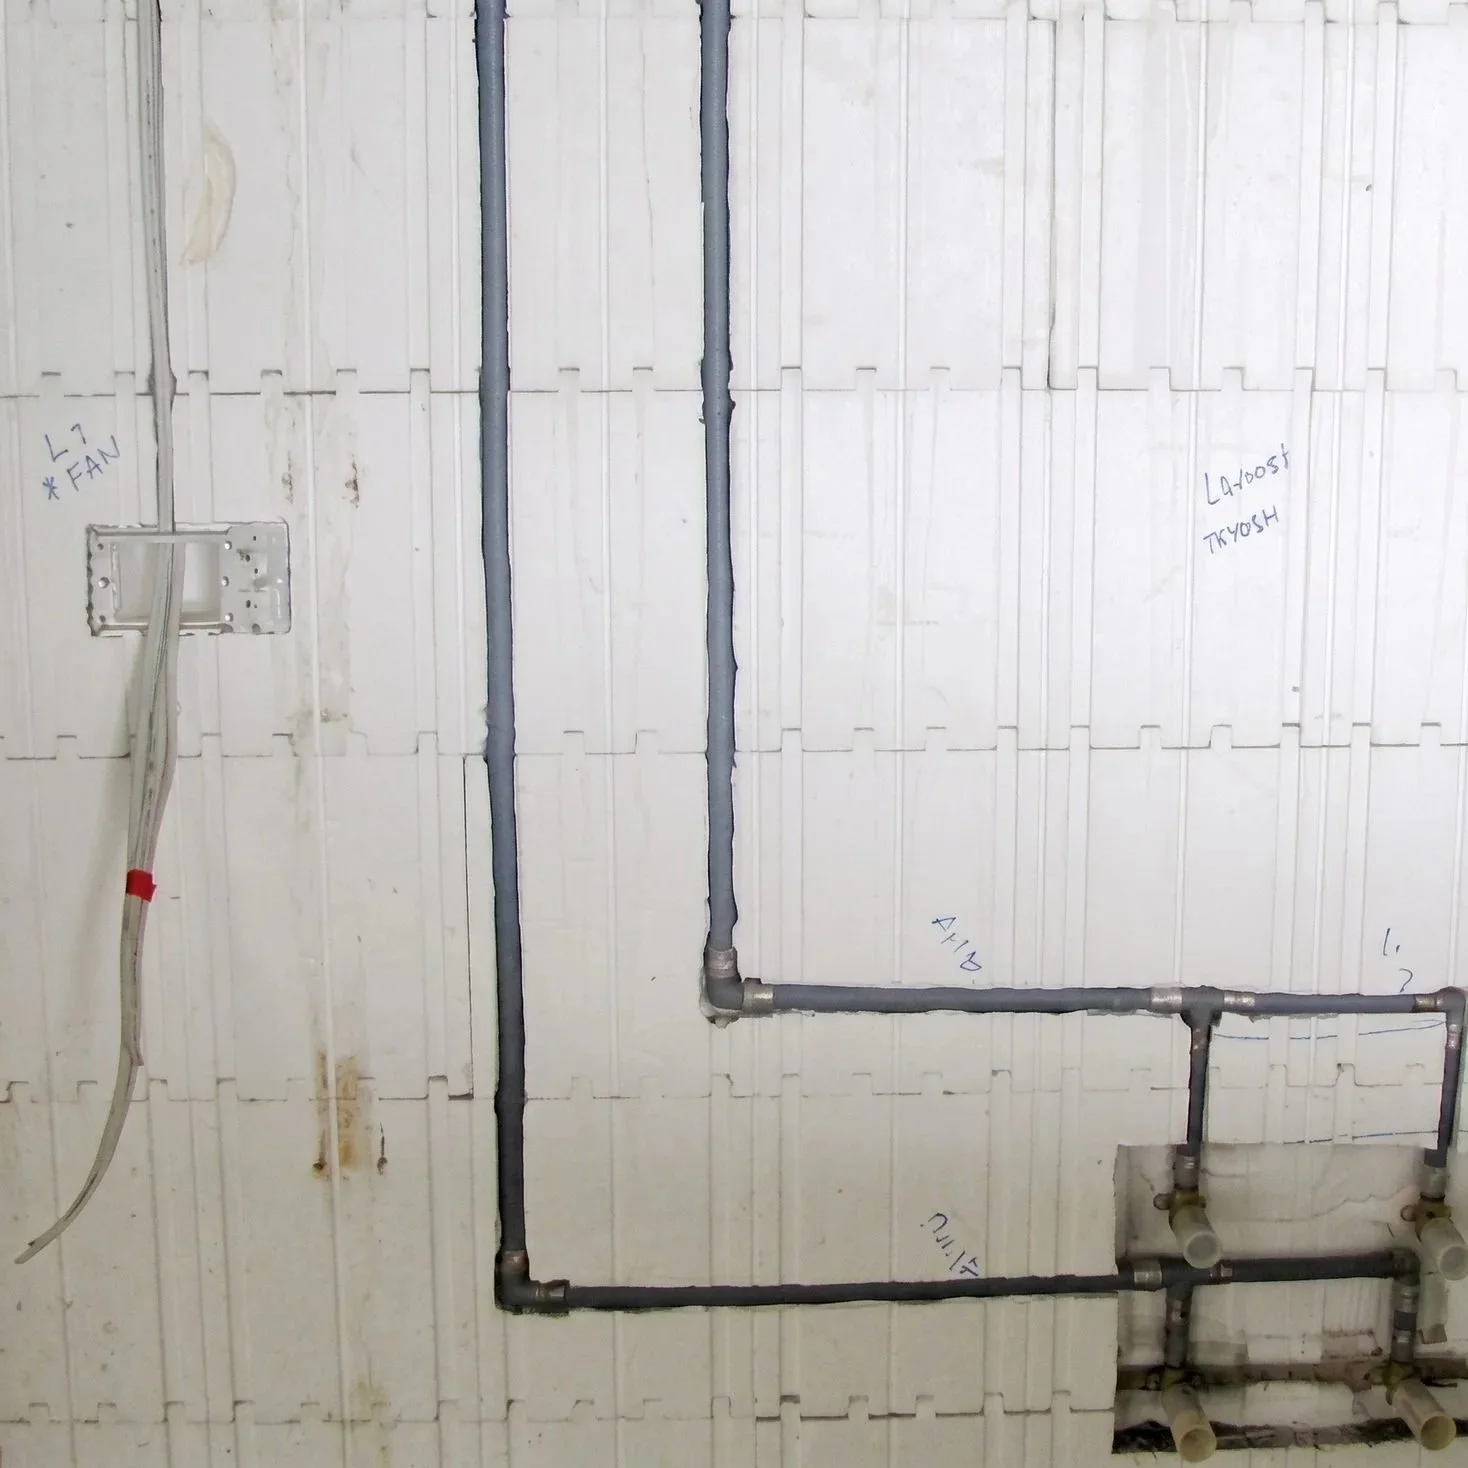
Plumbing & Electrical
Running services through Thermacell happens after the roof is on and requires zero noisy masonry chasing. You simply run your pipes and wiring through the ceiling space, then drop them vertically down the walls right where your power points and taps need to be.
To sink them into the wall, use an electric hot knife, router, or heat gun to melt clean channels into the internal foam back toward the concrete core. Push your conduits and pipes into the grooves, tack them flush, and your sparky and plumber are done—ready for plasterboard to go straight over the top.
Steel Reinforcement & Lintels
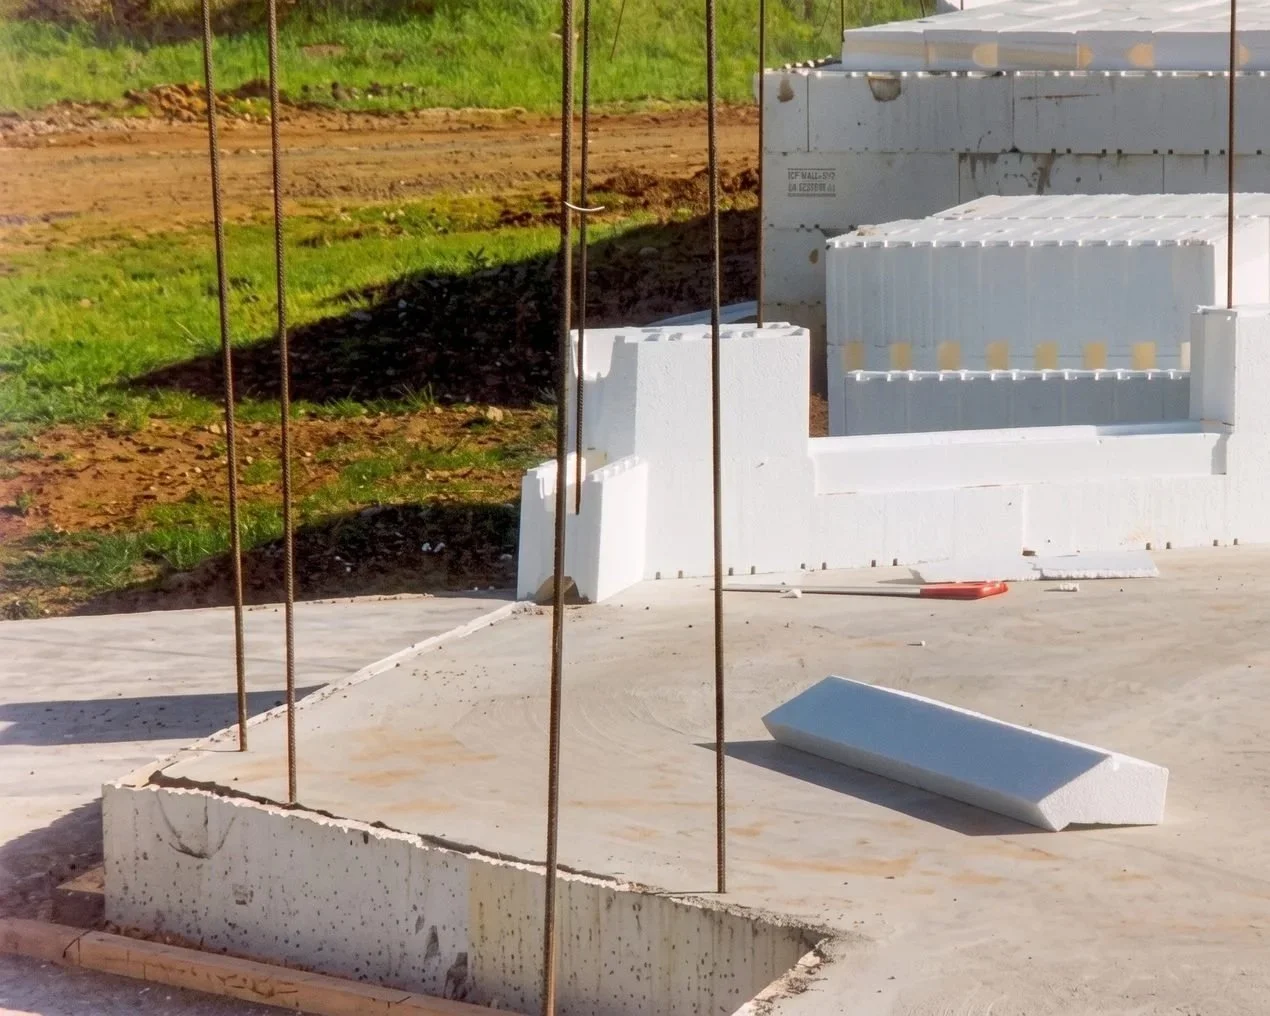
Placing steel in Thermacell is straightforward and follows standard residential engineering. For typical external walls, you simply drop an N12 (Y12) rebar vertically on either side of door and window openings, with another bar running continuously around the top course to form a rock-solid bond beam.
Over standard windows and doors, an N12 bar sits in the block cavity to form your structural lintel (stepping up to an N16 for openings over 2 metres). For large spans like a double garage, use two courses of 200mm or 250mm blocks reinforced with top and bottom N16 bars and ligatures, running at least 500mm past the opening on each side.
Internal non-load-bearing walls under trusses need no steel at all. You and a mate can drop all the rebar in as you stack each course—just match your layout to the Thermacell Engineering Design Manual for your engineer's final sign-off.
Walls, Concrete & Pumping
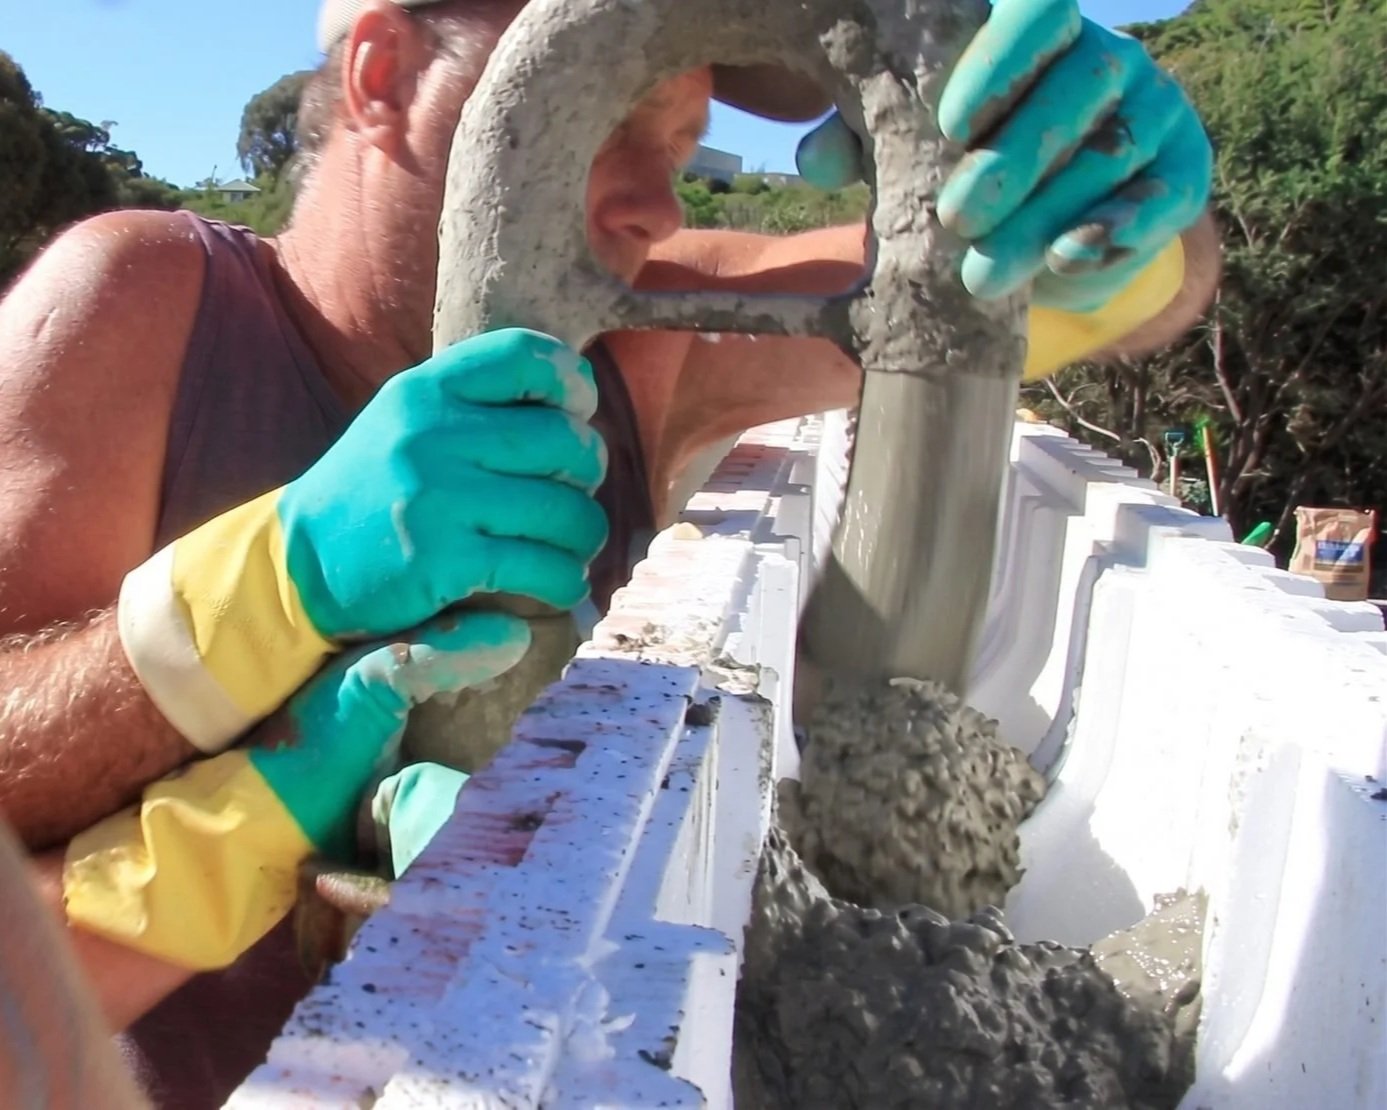
The concrete core provides the complete structural strength of your home, so ordering a dedicated ICF block-fill mix is essential. Specify a 25–32 MPa mix with 7mm aggregate (pea gravel), a 120mm slump, and at least 340 kg/m³ of cement to flow cleanly through narrow cavities and around steel. Use a concrete line pump with a 50mm hose and a 180° hook-pipe at the delivery end to place the mix slowly and steadily in continuous lifts.
Hand-filling the first two courses (500mm) beforehand locks in a dead-level base, while simply tapping the foam casing as you pour settles the concrete without requiring mechanical vibrators. Never wash concrete along the wall with a hose or let it free-fall from height, as keeping water content controlled prevents shrinkage cracks and blowouts.
Top Plates & Roof Trusses
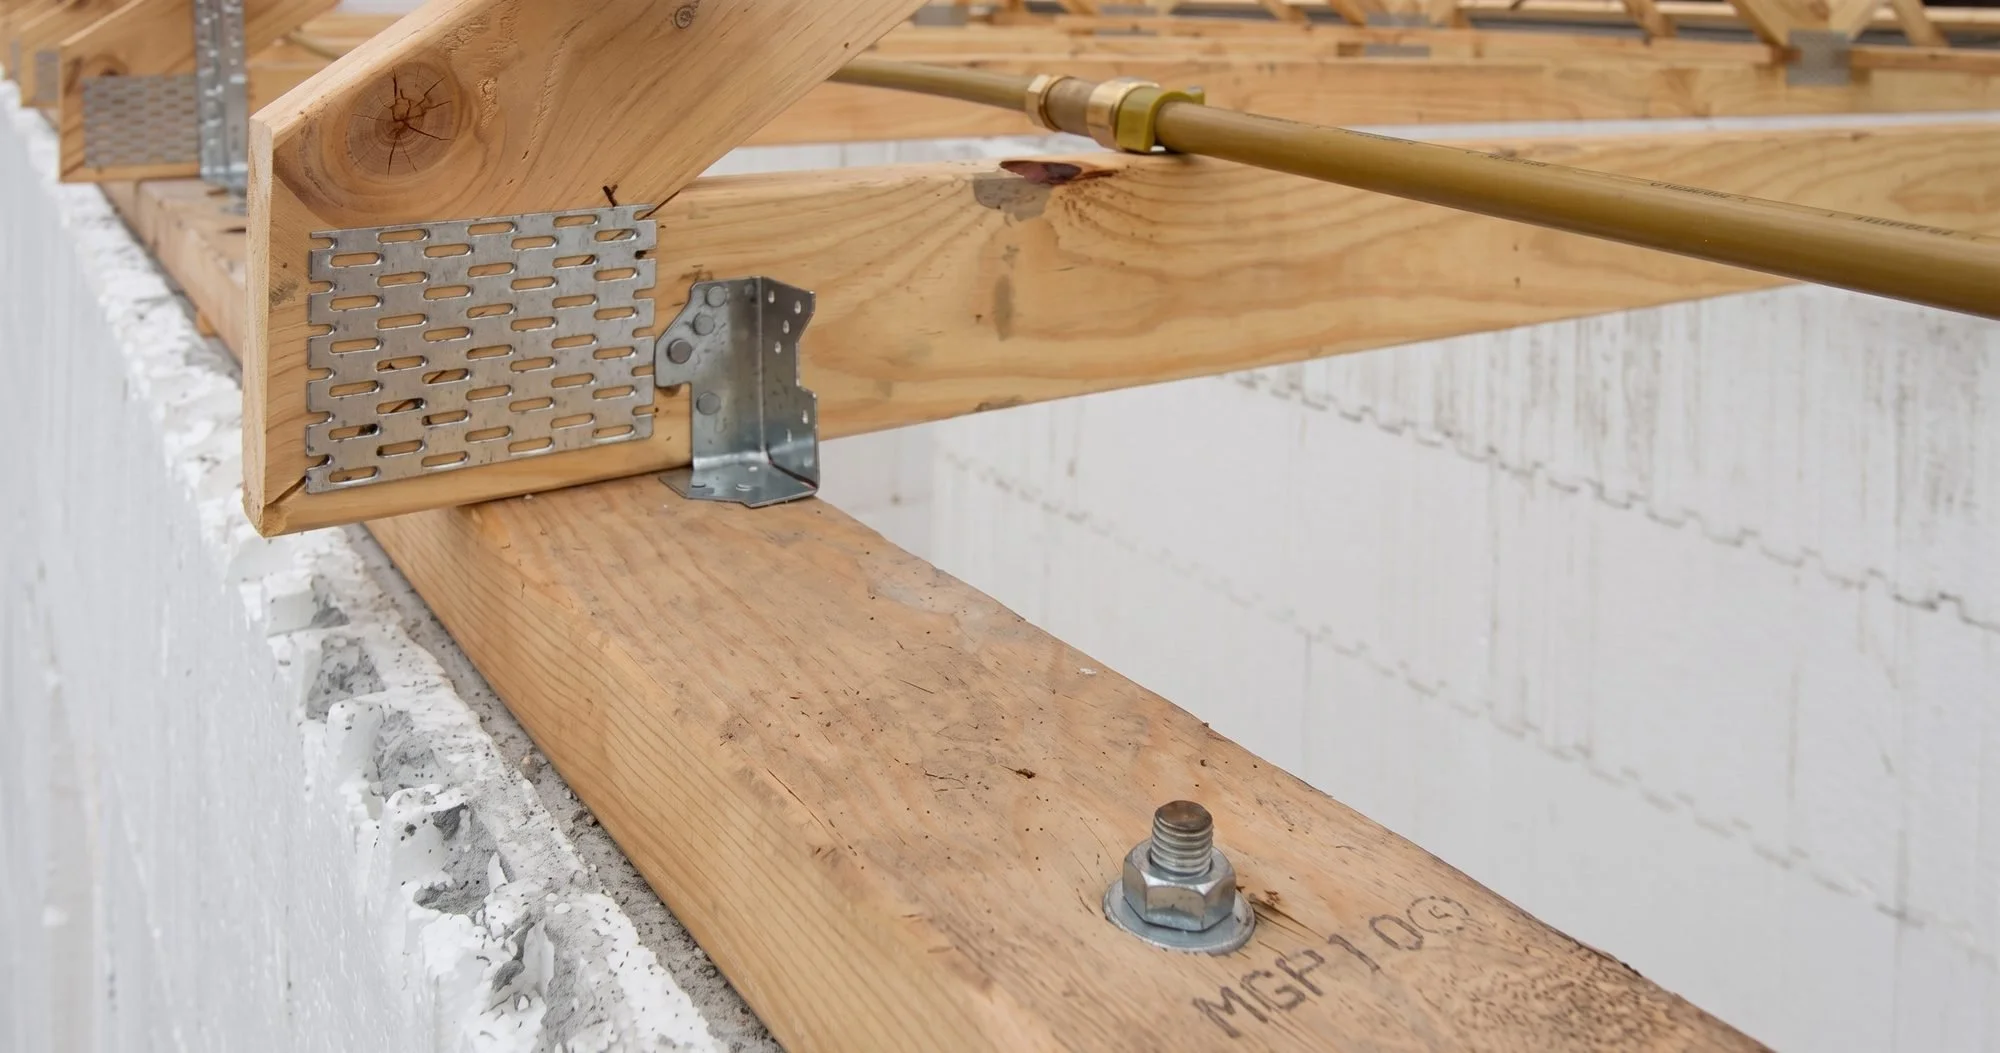
Securing your roof structure to Thermacell creates an engineered, cyclonic-strength tie-down directly into the concrete core. Before the concrete sets on pour day, push 250mm threaded bolts or heavy galvanized hoop iron straight into the wet concrete along the top course, spaced roughly 1.0m to 1.25m apart.
Once cured, bolt your timber top plates down hard over the threaded rods to give you a dead-level, continuous timber plate. From there, your standard timber or steel roof trusses install straight onto the plate using conventional framing brackets and tie-downs—just like a standard build, but anchored deep into solid reinforced concrete.
From Our Archives
Forty years of helping owner-builders get the job done right.
Timber Floor Construction
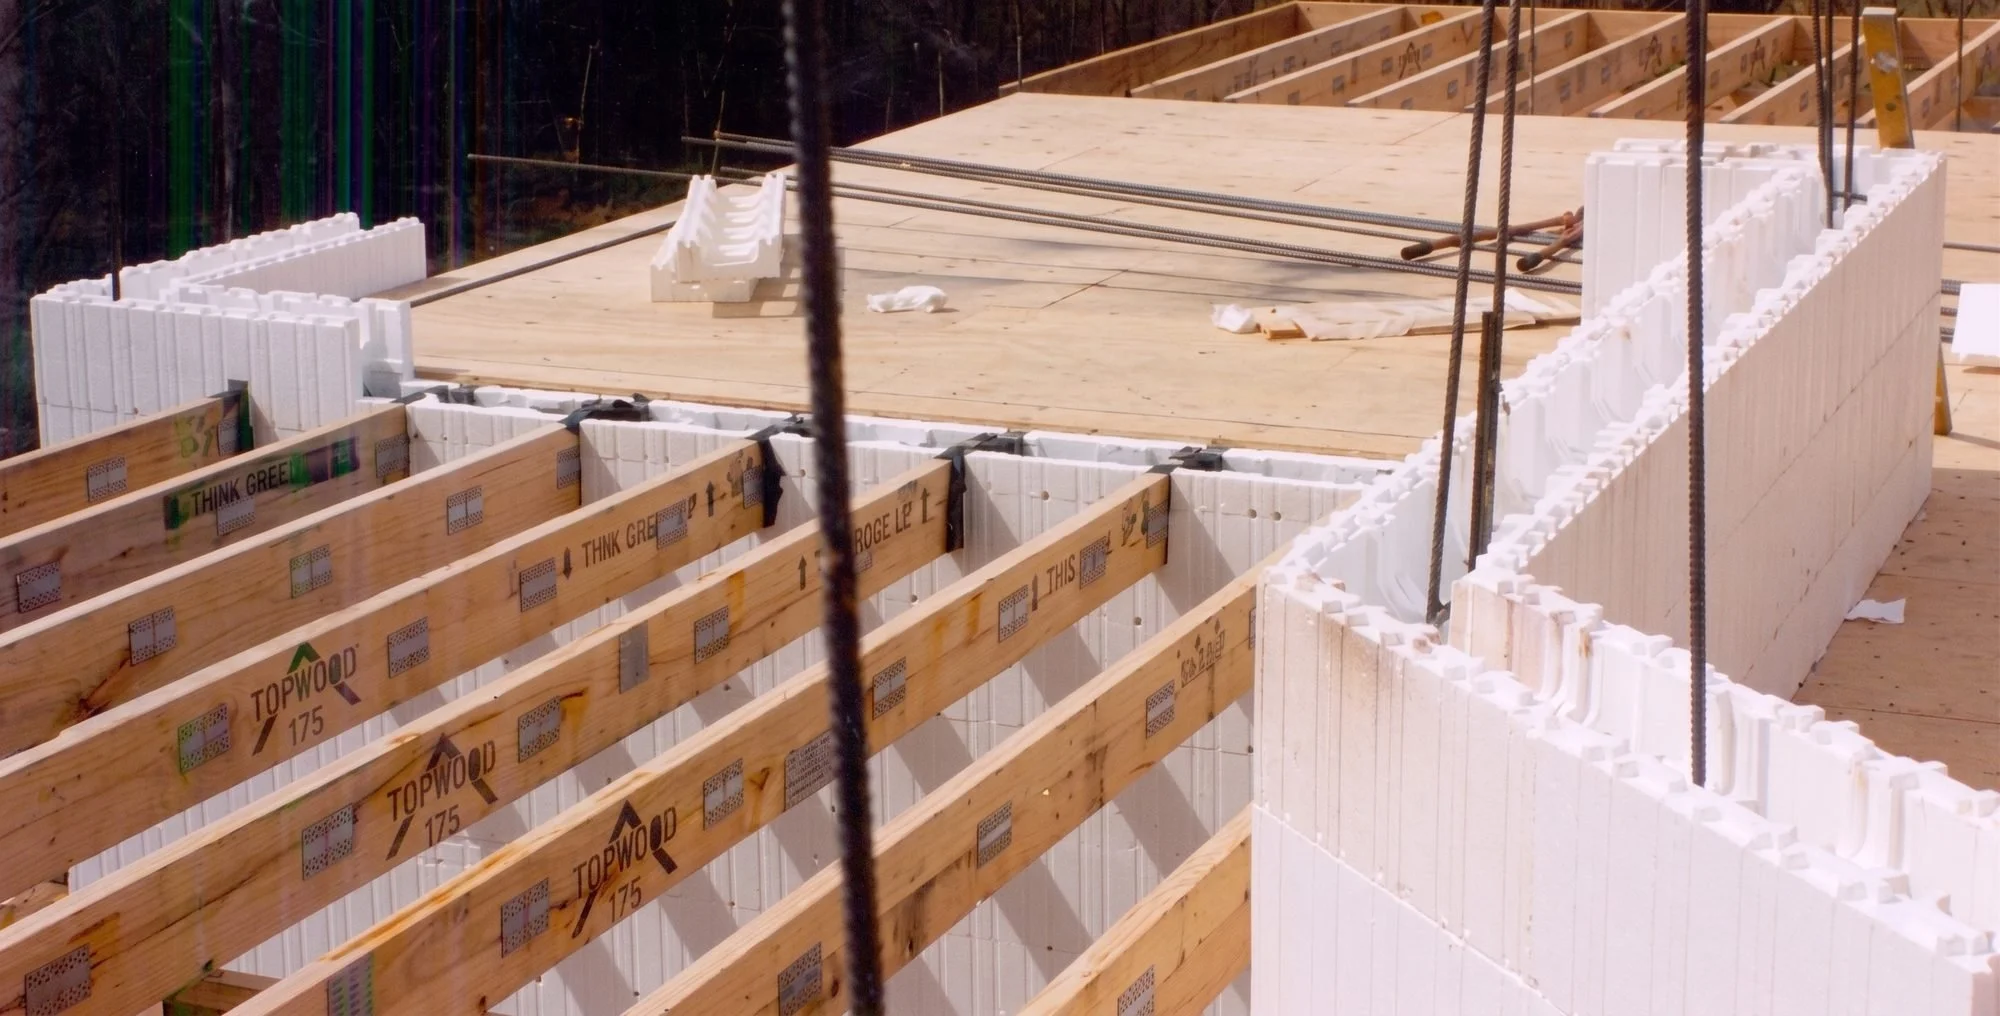
Building a suspended timber floor off strip footings is simple and ties the entire subfloor directly into your foundation. You dry-stack the Thermacell blocks up from your concrete footings to your subfloor height, then notch the inner foam or use standard joist hangers to sit your floor joists directly into the wall cavity.
When you pour concrete up to subfloor level, the wet mix encases the ends of the joists (or your cast-in ledger plates), locking your floor framing and foundation into one solid, continuous unit. Once your floor deck is laid, you just keep stacking your walls straight up to the ceiling.
External Wall Rendering
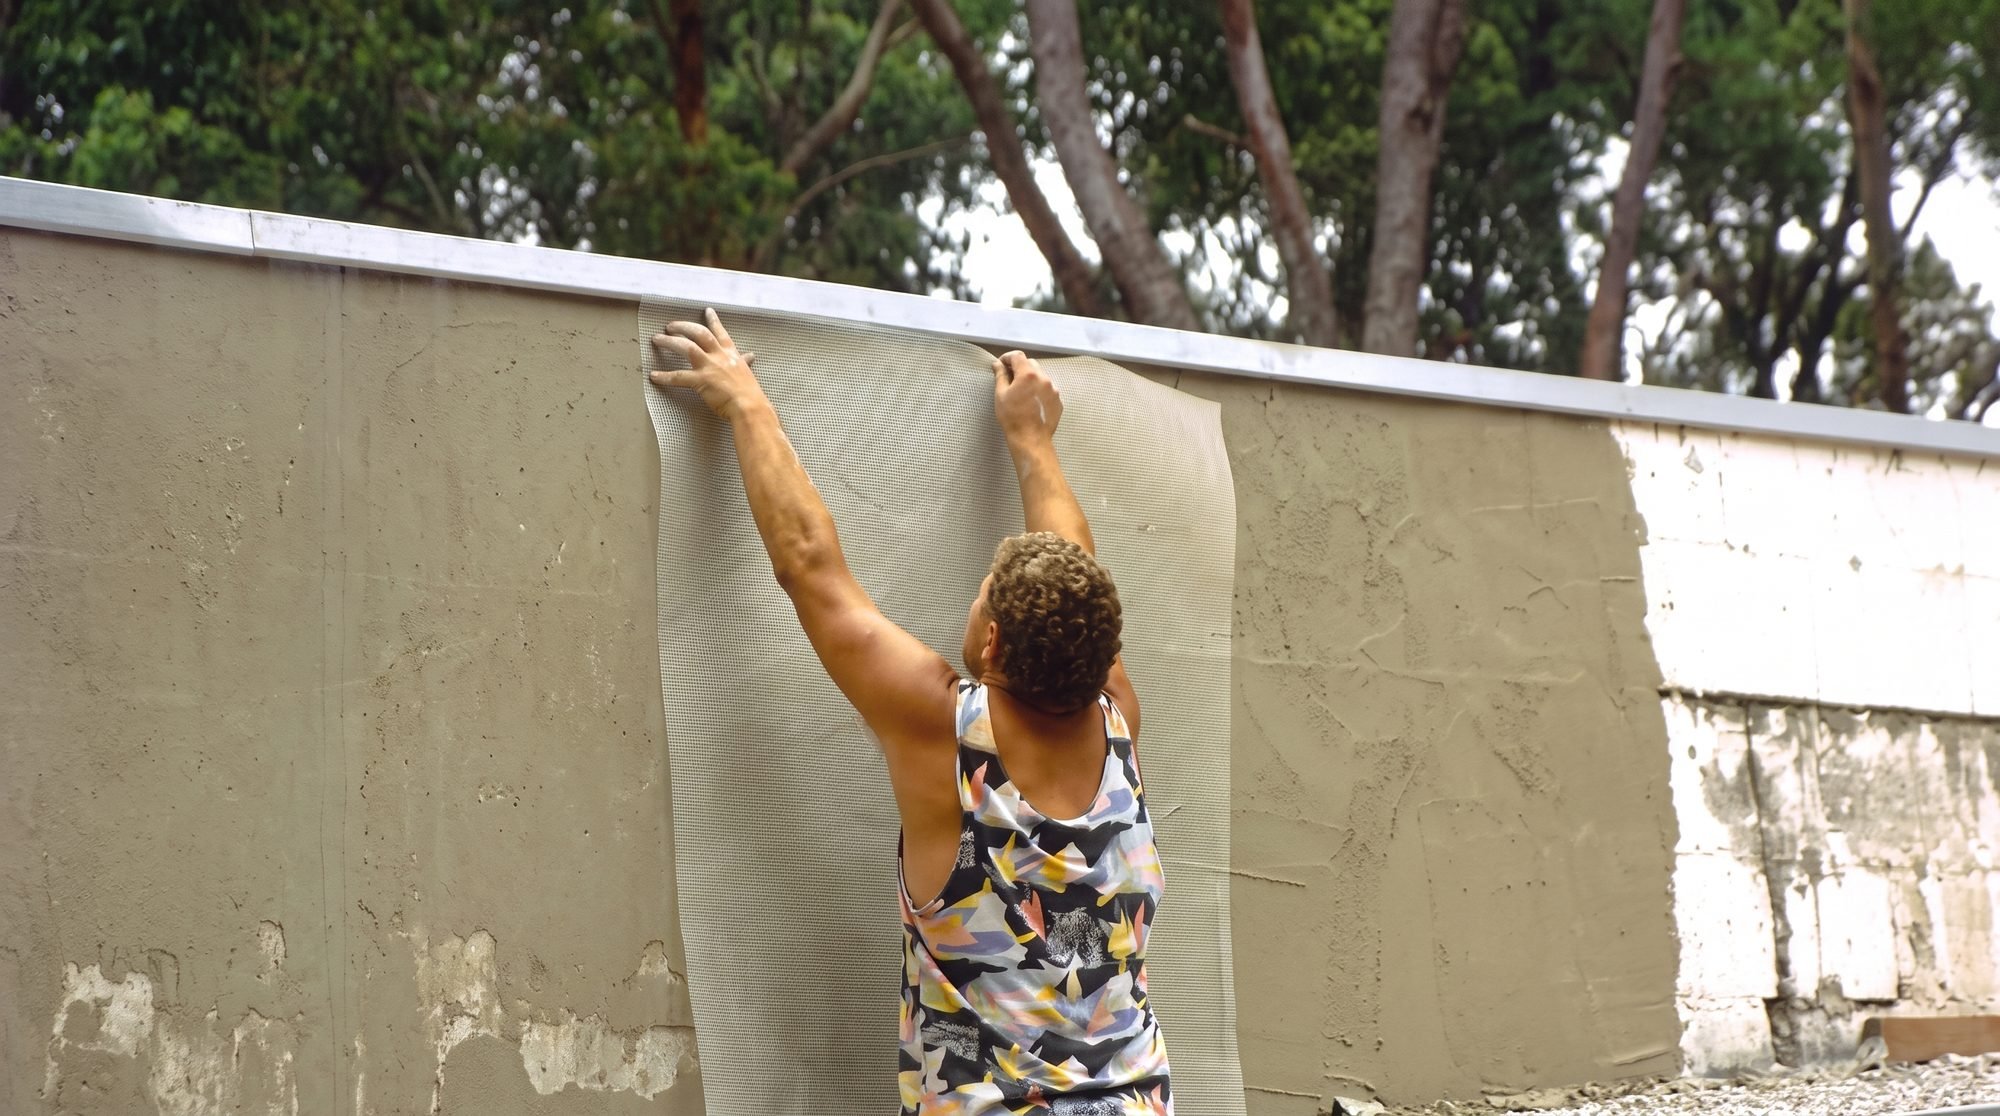
Rendering Thermacell is straightforward, but standard sand-and-cement brickies' render will not stick to polystyrene. You must use a polymer-modified acrylic render system with an embedded, alkali-resistant fibreglass mesh for high impact strength and crack resistance.
Give the outer foam a firm scrub with a stiff yard broom to remove any UV oxidation (yellow dust) and key the surface. Your solid plasterer trowels on a base coat of acrylic render, beds the mesh flat into the wet mix, and follows up with a second skim coat. Once cured, apply your textured finish and a rolled armour-coat membrane for a tough, weatherproof 5mm barrier that won't crack.
Wall Bracing & Alignment
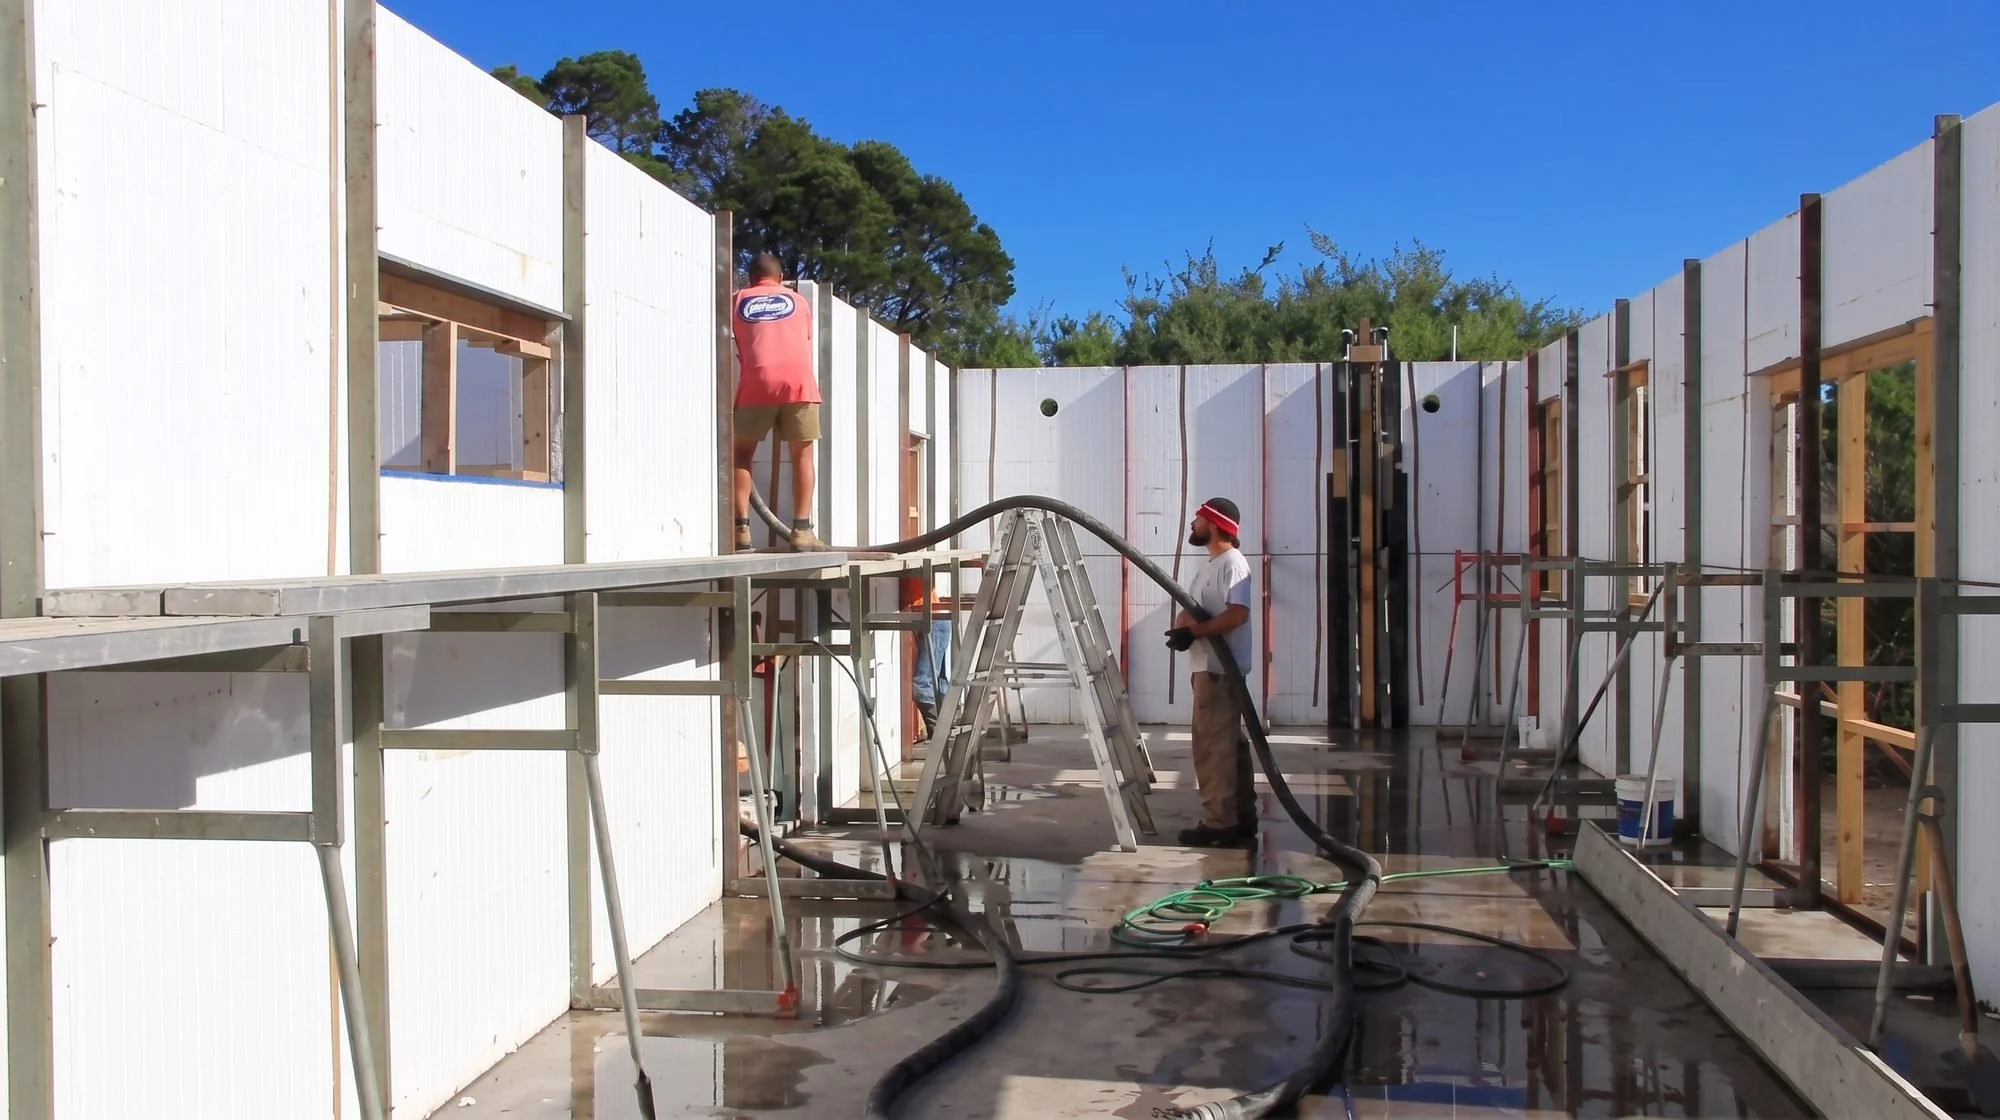
Thermacell’s precision interlocking keyways create a rigid wall assembly, meaning full-height double-sided bracing systems are not strictly required for standard builds. You and a mate can stack and pour standard single-storey walls without specialised bracing, provided sensible alignment checks are maintained. We only recommend temporary timber or metal prop bracing on exposed, high-wind sites or when pouring walls above 2.5m to 3.0m in a single lift.
For most standard residential builds, basic propping at corners and long spans is purely down to personal preference for peace of mind while checking your line and plumb. Simply keep your walls straight as you stack, secure your door and window bucks, and the system holds true through the pour.
Forming Archways
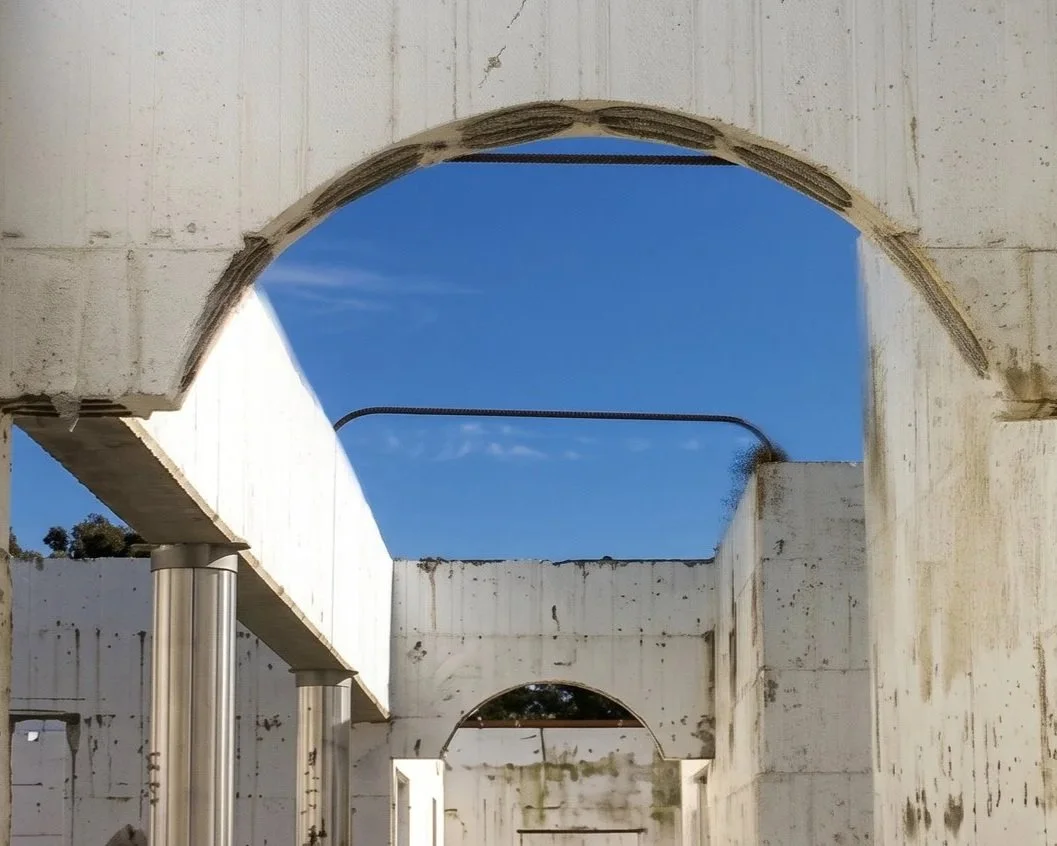
Creating custom curved archways in Thermacell is clean, fast, and needs no complex timber formwork. Scribe your desired curve onto the unfilled wall, then cut the EPS shape out cleanly using a handsaw or keyhole saw.
Line the underside of the cut-out curve with a flexible strip of flat sheet metal to form a smooth soffit. Push the cut-out foam block back underneath to prop and support the steel, then pour your concrete as normal. After 24 hours, pull the foam plug and sheet metal out, and your reinforced concrete arch is ready for flexible plasterboard or render.
Got plans?
Let’s price your build. Send Us Your Drawings & We’ll do the math.
Common Questions
-
Full proprietary bracing systems are not strictly required because the precision interlocking blocks create a rigid wall on their own. We only recommend simple timber or metal props on very exposed high-wind sites or if you are pumping concrete above 2.5m in a single lift. For standard single-storey builds, light propping at corners and long spans is purely down to your own preference for peace of mind while checking plumb.
-
Order a dedicated ICF block-fill mix from your local plant: 25 MPa to 32 MPa strength with a 7mm aggregate (pea gravel), a 120mm slump, and at least 340 kg/m³ of cement. Standard 14mm or 20mm aggregate must not be used because larger stones will bridge and jam around the steel rebar.
-
You can do either. We recommend hand-filling the first two courses (500mm) using a barrow to lock in a dead-level base. The rest of the wall can be completed in stages by hand or pumped up to 2.5m in a single lift using a concrete line pump fitted with a 50mm reduction hose and a 180° hook pipe.
-
The first course dry-stacks straight over standard vertical starter bars (rebar) cast into your concrete footing or slab edge. This permanently anchors the concrete wall core directly to your foundation without needing wet mortar beds.
-
Standard builds typically require an N12 reinforcing bar on each side of openings and continuous horizontal steel around the top course to form a bond beam. Over standard windows and doors, N12 or N16 bars sit in the block cavity to form a structural lintel, while wide garage spans use multiple courses with top and bottom rebar tied with ligatures.
-
Services are roughed in after the roof is on with zero noisy brick chasing. You run your conduits and pipes through the ceiling space, drop them down the walls, and use an electric hot knife, router, or heat gun to melt clean vertical channels into the inner foam face back towards the concrete core.
-
Plasterboard adheres directly to the polystyrene using standard stud adhesive daubs. Simply give the foam a quick scrub with a stiff yard broom to remove any light surface oxidation, apply the adhesive, and use standard plastering nails tapped into the foam or concrete core to hold the sheets flat while the glue cures.
-
Traditional sand-and-cement render will not adhere to polystyrene. You must use a polymer-modified acrylic render system with an embedded, alkali-resistant fibreglass mesh trowelled into the base coat, followed by a texture coat and protective membrane to create a crack-free, weatherproof barrier.
-
Before the concrete cures during your final pour, insert 250mm threaded bolts or heavy galvanised hoop iron directly into the wet core every 1.0m to 1.25m along the top course. Once hardened, bolt your timber top plates down flat to provide a solid base for standard timber or steel roof trusses.
-
Yes. For suspended timber floors, dry-stack the blocks up from your footings to subfloor level, house your floor joists directly into the cavity (or cast in ledger plates), and pour the concrete to floor height to lock the subfloor into the foundation. On sloping sites, the reinforced concrete core acts as your engineered earth-retaining wall and house wall in a single pour.
Contact Us
Interested in working together? Fill out some info and we will be in touch shortly.